
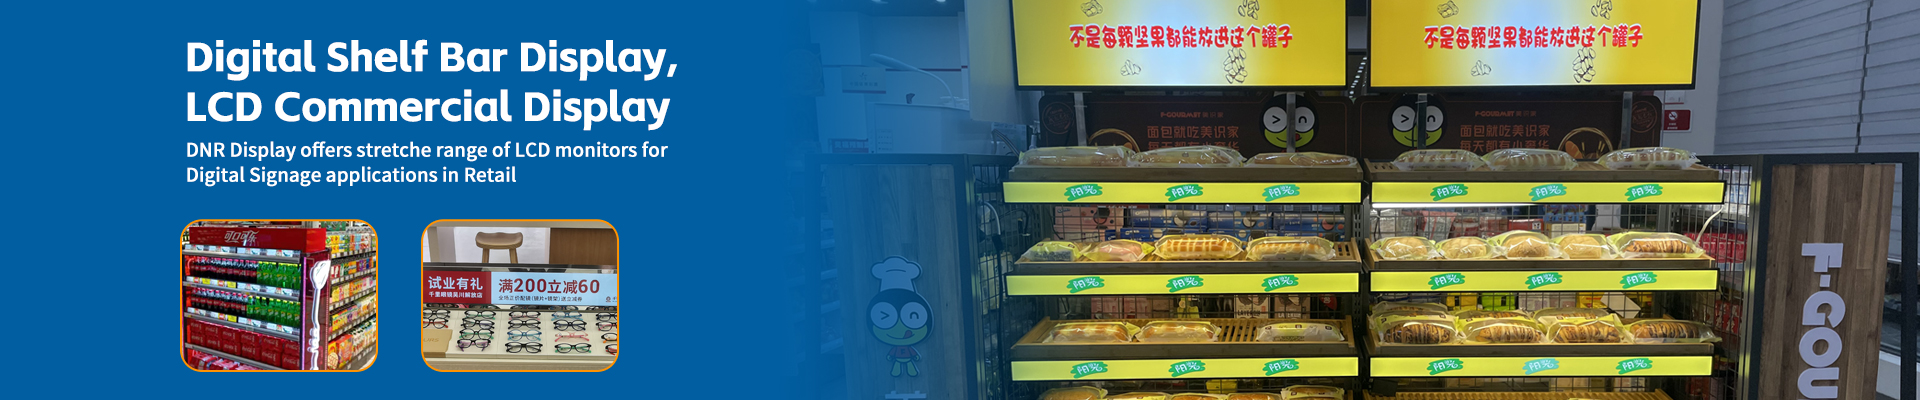
One of the biggest concerns many retailers have about adopting shelf edge displays is the installation process. If you’re like most store owners, you might be worried about complicated wiring, technical expertise requirements, or having to hire expensive professionals to get everything set up. The good news? Modern shelf edge displays are designed with the DIY user in mind, and you can absolutely install them yourself in about 10 minutes per display – no technical degree required.
Let’s walk through the installation process step by step, showing you just how straightforward it really is. By the end of this guide, you’ll feel confident that you can handle your own shelf edge display installation without breaking a sweat or your budget.

What You’ll Need: The Simple Setup Checklist
Before we dive into the installation process, let’s gather everything you’ll need. The good news is that the list is short, and you probably already have most of these items in your store.
What Comes in the Box:
- The shelf edge display unit
- Mounting bracket or clip (varies by manufacturer)
- Battery (if battery-powered) or power adapter (if wired)
- Quick start guide
- Any necessary screws or mounting hardware
Tools You Might Need:
- A clean, dry cloth for cleaning surfaces
- A small Phillips head screwdriver (for some mounting options)
- A level (optional, but helpful for straight alignment)
- Your smartphone with the management app installed
Preparation Steps:
- Clean Your Shelf Edges: Take a moment to wipe down the edges of your shelves where the displays will be mounted. Dust, grease, or debris can affect how well the mounting hardware adheres or grips the surface.
- Plan Your Layout: Before you start installing, take a few minutes to plan where each display will go. Consider which products need displays, the optimal viewing height for customers, and how the displays will align with your existing shelf layout.
- Charge Your Displays: If you’re using battery-powered displays, make sure they’re fully charged before installation. Most come partially charged, but a full charge ensures they’ll work right away.
- Download the App: Install the management app on your smartphone and create your account. This way, you’ll be ready to configure the displays as soon as they’re mounted.
Step 1: Understanding Your Mounting Options
Modern shelf edge displays come with several mounting options, and choosing the right one for your shelves is the first step to a successful installation. Let’s look at the most common types:
Clip-On Mounts: These are the most popular and easiest to install. The display comes with a built-in clip that simply snaps onto the edge of your shelf. No tools required – just align the clip with the shelf edge and press firmly until you hear it click into place.
Adhesive Backing: Some displays use strong adhesive backing that sticks directly to the shelf edge. These are great for shelves with thin edges or when you want a more permanent installation. Just peel off the protective backing and press firmly onto a clean, dry surface.
Screw-Mounted Brackets: For heavy-duty applications or when you need extra security, some displays come with small brackets that screw into the shelf edge. These require a screwdriver but provide the most secure mounting option.
Magnetic Mounts: A newer option that’s gaining popularity, magnetic mounts allow you to easily remove and reposition displays as needed. They’re perfect if you frequently change your store layout or product arrangement.
Step 2: Installing the Display (The 10-Minute Process)
Now let’s get to the actual installation. Follow these steps, and you’ll have your first display up and running in no time.
Step 2.1: Prepare the Mounting Surface (1 minute)
Take your clean cloth and wipe down the specific spot on the shelf edge where the display will go. This ensures good contact for clip-on or adhesive mounts. Make sure the surface is completely dry before proceeding.
Step 2.2: Position the Mounting Hardware (2 minutes)
If your display uses separate mounting hardware (like a bracket or adhesive plate), position it first. For clip-on displays, you can skip this step and move directly to mounting the display itself.
- For adhesive mounts:Remove the protective backing and carefully position the adhesive plate on the shelf edge. Press firmly for 30 seconds to ensure good adhesion.
- For bracket mounts:Hold the bracket in position and use a pencil to mark the screw holes. Then, drill small pilot holes (if needed) and secure the bracket with the provided screws.
Step 2.3: Mount the Display Unit (3 minutes)
This is where the magic happens. Take your display unit and attach it to the mounting hardware:
- For clip-on displays:Simply align the clip with the shelf edge and press firmly until you hear or feel it click into place. Give it a gentle tug to make sure it’s secure.
- For adhesive-mounted displays:Most adhesive systems have the display unit snap onto the adhesive plate. Align the display with the plate and press until it clicks.
- For bracket-mounted displays:Slide the display into the bracket or secure it with the provided locking mechanism.
Step 2.4: Power On the Display (1 minute)
If your display is battery-powered, it should turn on automatically when mounted. If it’s wired, connect the power adapter and plug it in. You should see the display light up with either a welcome message or a default screen.
Step 2.5: Connect to the Network (2 minutes)
This is where your smartphone comes in handy:
- Open the management app on your phone
- Follow the in-app instructions to add a new display
- The app will guide you through connecting the display to your store’s Wi-Fi network
- Once connected, the display will show a confirmation message or code
Step 2.6: Configure Display Settings (1 minute)
Using the app, you can now configure basic settings for your display:
- Set the display name or location (e.g., “Aisle 3 – Beverages”)
- Choose your preferred brightness level
- Set the time zone for accurate scheduling
- Test the display with a sample price or message
That’s it! In roughly 10 minutes, you’ve successfully installed your first shelf edge display. Repeat this process for your remaining displays, and you’ll have your entire system up and running in no time.
Pro Tips for Flawless Installation
While the basic installation is straightforward, these pro tips will help you achieve professional results and avoid common pitfalls:
Work Systematically: Install displays in one section of your store at a time rather than jumping around. This helps you stay organized and ensures you don’t miss any displays.
Keep Displays Level: Use a small level to ensure your displays are straight. Crooked displays look unprofessional and can be harder for customers to read.
Test Before Final Placement: Before securing the display permanently, test it to make sure it’s working properly. It’s easier to make adjustments before the mounting is complete.
Consider Customer Viewing Angle: Position displays so they’re easily readable from the angle customers will approach them. Usually, this means slightly tilting the display forward rather than having it perfectly vertical.
Group Similar Displays: If you have different types of products, consider using consistent display placement within each product category. This creates a more organized, professional appearance.
Document Your Installation: Take photos of your installation and note the location of each display. This will be helpful for future maintenance or if you need to add more displays later.
Troubleshooting Common Installation Issues
Even with the most straightforward systems, you might encounter a few hiccups. Here’s how to handle the most common installation challenges:
Display Won’t Power On:
- Check that the battery is properly inserted (for battery-powered units)
- Ensure the power adapter is securely connected (for wired units)
- Try a different power outlet or USB port
- Check that the battery isn’t completely drained and needs charging
Display Won’t Connect to Wi-Fi:
- Make sure you’re within range of your Wi-Fi router
- Verify that you’re entering the correct Wi-Fi password
- Check that your network is working properly with other devices
- Try restarting both the display and your router
Mounting Hardware Doesn’t Fit:
- Measure your shelf edge thickness and compare with the display specifications
- Some displays come with adapters for different shelf thicknesses
- Contact the manufacturer if you need different mounting hardware
Display Looks Crooked:
- Remove and reposition the display
- Use a level to ensure straight alignment
- Check that your shelf edge itself is level
App Can’t Find the Display:
- Make sure Bluetooth is enabled on your phone
- Restart both the display and your phone
- Check that the display is powered on and in pairing mode
- Try moving closer to the display during pairing
Scaling Up: Installing Multiple Displays Efficiently
Once you’ve mastered installing a single display, you’ll want to install multiple displays efficiently. Here’s how to scale up your installation process:
Create an Installation Plan:
- Map out exactly where each display will go
- Group displays by product category or store section
- Plan the most efficient route through your store for installation
Batch Your Work:
- Install all mounting hardware first, then add display units
- Configure multiple displays at once using the app’s batch features
- Test displays in groups rather than individually
Use Templates:
- Create display templates in the app for different product types
- Apply consistent settings across similar displays
- Use bulk operations for updates and configuration changes
Get Help if Needed:
- While you can do it yourself, having a helper can speed up the process
- One person can handle mounting while another manages the app configuration
- Consider scheduling installation during slower store hours
Maintenance and Adjustments
Installation isn’t a one-time event – you’ll occasionally need to adjust or maintain your displays. Here’s what to keep in mind:
Regular Cleaning:
- Wipe displays with a soft, dry cloth to remove dust and fingerprints
- Avoid using harsh chemicals or abrasive materials
- Clean displays during your regular store maintenance routine
Battery Management:
- Monitor battery levels through the management app
- Replace batteries when they reach 20% capacity
- Consider rechargeable batteries for long-term cost savings
Position Adjustments:
- Occasionally check that displays haven’t shifted or become loose
- Remount any displays that don’t feel secure
- Adjust angles if lighting conditions change in your store
Firmware Updates:
- Keep displays updated with the latest firmware
- Updates often include performance improvements and new features
- Most updates can be pushed remotely through the management app
When to Call for Help
While most installations are straightforward DIY projects, there are times when you might want professional help:
Complex Store Layouts: If you have an unusually large store or complex shelving system, professional installation might save time and ensure optimal placement.
Custom Integration Needs: If you need to integrate displays with existing POS or inventory systems, professional installers can ensure smooth integration.
Large-Scale Deployments: For installations with 50+ displays, professional installation might be more efficient and cost-effective.
Warranty Concerns: Some manufacturers require professional installation to maintain warranty coverage – check your warranty terms.
Conclusion: You’ve Got This!
Installing shelf edge displays yourself isn’t just possible – it’s actually quite simple and rewarding. The technology has evolved to be user-friendly, and manufacturers understand that retailers need solutions they can implement without specialized technical knowledge.
By following this guide, you can confidently install your own shelf edge display system in just 10 minutes per display, saving money on installation costs and gaining valuable hands-on knowledge of how your system works. The DIY approach also means you’ll be better equipped to handle any future adjustments or maintenance needs.
Remember that the key to successful installation is preparation, patience, and following the manufacturer’s specific instructions for your particular display model. Take your time, work systematically, and don’t hesitate to reach out to customer support if you encounter any challenges.
Before you know it, you’ll have a fully functional electronic shelf label system that you installed yourself – ready to save you time, improve pricing accuracy, and enhance your store’s professional appearance. The satisfaction of completing this DIY project will be matched only by the operational benefits your new shelf edge displays bring to your business.


